How to store shallots in the freezer? 6 Best steps
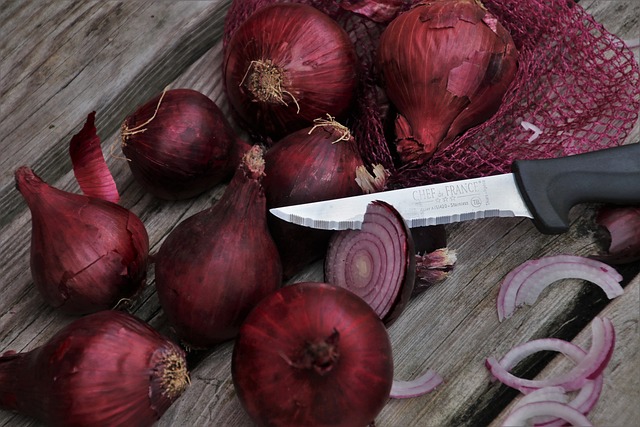
Shallots are a type of onion that has a milder flavor and a more subtle taste compared to regular onions. They are often used in cooking to add depth of flavor to dishes and are commonly found in French and Asian cuisines.
Shallots have a brown papery skin and are composed of multiple cloves, similar to garlic.
How to store shallots in the freezer?
To freeze shallots, peel and chop them to your desired size. Spread the chopped shallots on a tray for initial pre-freezing to prevent sticking, then transfer them to airtight freezer bags or containers, removing excess air. Label and date the packages before storing them in the freezer for up to 12 months.
6 Best steps to store shallots:
To store shallots in the freezer, follow these steps:
Peel and Chop:
Peel the shallots and chop them according to your preference, whether you want them finely chopped, sliced, or minced.
Spread on a Tray:
Spread the chopped shallots on a tray lined with parchment paper. This prevents the pieces from sticking together during freezing.
Pre-Freeze:
Place the tray in the freezer for a few hours until the shallot pieces are individually frozen. This step helps to prevent clumping.
Transfer to Bags or Containers:
Once the individual pieces are frozen, transfer them to airtight freezer bags or containers. Squeeze out as much air as possible to minimize freezer burn.
Label and Date:
Don’t forget to label the bags or containers with the date of freezing. This helps you keep track of their freshness.
Store in Freezer:
Place the bags or containers in the freezer for long-term storage.
When you’re ready to use them, you can take out the desired amount without thawing the entire batch. Frozen shallots are suitable for use in cooked dishes, but they may not retain the crisp texture of fresh shallots, so they are best used in recipes where texture is not crucial, such as soups, stews, or sauces.
How long do shallots last in the freezer?
When stored properly, shallots can last in the freezer for about 6 to 12 months. It’s important to use airtight containers or freezer bags to minimize exposure to air, which can cause freezer burn and affect the quality of the shallots over time.
Additionally, labeling and dating the packages can help you keep track of their freshness, allowing you to use the oldest ones first. Always ensure that your freezer maintains a consistent temperature to preserve the quality of the frozen shallots.
What is the best way to preserve shallots?
The best way to preserve shallots for an extended period is to store them in a cool, dry place. Here’s a step-by-step guide:
Curing:
Allow freshly harvested shallots to cure for a few days. This involves leaving them in a well-ventilated, dry area with their tops attached. Curing helps the outer layers dry, promoting better storage.
Trimming:
After curing, trim the tops of the shallots, leaving about an inch of the stem. This helps prevent moisture loss and decay.
Storage Location:
Choose a cool, dark place for storage. A mesh bag or basket with good ventilation works well. Avoid areas with high humidity or direct sunlight.
Temperature and Humidity:
Ideally, store shallots at temperatures between 32°F (0°C) and 40°F (4°C). Maintain moderate humidity levels to prevent them from drying out.
Avoid Refrigeration:
Shallots do not fare well in the refrigerator, as the cold temperatures can lead to sprouting or mold growth.
By following these steps, you can keep shallots in good condition for several months. Regularly check for any signs of spoilage, and use those that show any issues promptly.
Defrosting and using frozen shallots
When defrosting and using frozen shallots, follow these steps:
Refrigerator Method:
Place the frozen shallots in the refrigerator and allow them to thaw slowly. This method is the safest and helps maintain the best quality.
Microwave Method:
Use the defrost setting on your microwave if you need to thaw them quickly. Be cautious to avoid cooking them during this process.
Drain Excess Moisture:
After thawing, you may notice excess moisture. Drain any liquid to prevent sogginess in your dishes.
Cooking:Use the thawed shallots in cooked dishes. Frozen shallots may lose some crispness, so they are best suited for recipes where texture is not crucial, such as soups, stews, sauces, or sautés.
Avoid Refreezing: Once thawed, it’s not recommended to refreeze shallots. This can impact their texture and flavor.
Adjust Quantities: Keep in mind that the frozen shallots might have a slightly different texture compared to fresh ones, so you might want to adjust quantities based on personal preference.
By following these steps, you can successfully incorporate frozen shallots into your cooking. Remember to use them within a reasonable time after thawing for the best flavor and quality.
Common problems with shallots and their solutions include:
Sprouting:
Problem: Shallots can start sprouting if exposed to warmth and light.
Solution: Store shallots in a cool, dark place to minimize sprouting. Use sprouted shallots promptly in cooking.
Mold and Rot:
Problem: Moisture can lead to mold or rot, especially if shallots are stored in a humid environment.
Solution: Ensure proper curing and trimming before storage. Store in a well-ventilated, dry area with moderate humidity. Check regularly for signs of spoilage.
Softening:
Problem: Shallots can become soft due to excess moisture or age.
Solution: Store shallots in a dry place with good ventilation. Use older shallots first and avoid storing them near high-moisture vegetables.
Freezer Burn (for Frozen Shallots):
Problem: Frozen shallots may develop freezer burn if not properly sealed.
Solution: Use airtight containers or freezer bags to minimize air exposure. Label and date packages, and store them in a consistently cold freezer.
Overcooking:
Problem: Shallots can turn bitter if overcooked.
Solution: Add shallots later in the cooking process or cook them over low to medium heat. Pay attention to the texture, and avoid caramelizing them to the point of bitterness.
Insects or Pests:
Problem: Shallots can attract insects or pests during storage.
Solution: Inspect shallots before storage, and discard any damaged or infested ones. Consider using natural repellents or storing them with aromatic herbs that deter pests.
Tips for Freezing Shallots:
Peel and Chop:
Peel and chop shallots to your desired size before freezing. This makes them more convenient to use later.
Pre-Freeze Individually:
Spread chopped shallots on a tray for initial pre-freezing. This prevents them from sticking together and makes it easier to take out the desired amount later.
Use Airtight Containers or Bags:
Once pre-frozen, transfer shallots to airtight freezer bags or containers. Remove excess air to prevent freezer burn.
Label and Date:
Always label the containers or bags with the date of freezing. This helps you keep track of freshness and use older batches first.
Portion Control:
Freeze shallots in portion-sized amounts if you often use a specific quantity in recipes. This way, you can take out what you need without thawing the entire batch.
Avoid Refreezing:
Once you’ve thawed frozen shallots, it’s not recommended to refreeze them. Plan to use the entire batch or store any leftovers in the refrigerator and use them within a short timeframe.
Tools for Freezing Shallots:
Freezer Bags or Containers:
Airtight freezer bags or containers are essential to prevent freezer burn and protect the shallots from moisture.
Trays or Baking Sheets:
Use trays or baking sheets for the initial pre-freezing of chopped shallots. This helps maintain individual pieces.
Permanent Marker:
Label bags or containers with the date of freezing and any additional information, such as the size of the chopped pieces.
Vacuum Sealer (Optional):
If you have a vacuum sealer, it can help remove even more air, providing optimal storage conditions for frozen shallots.
Frequently Asked Questions
Can I freeze shallots without chopping them first?
While you can freeze whole shallots, chopping them before freezing allows for easier portioning and quicker incorporation into dishes later. It also helps prevent freezer burn.
Should I blanch shallots before freezing?
No, blanching is not necessary for shallots. However, pre-freezing them on a tray before transferring them to airtight containers or bags helps maintain individual pieces.
Can I freeze shallots in plastic bags?
Yes, you can use airtight plastic freezer bags. Ensure to remove excess air, label the bags with the date, and store them flat for easy stacking.
How long can I freeze shallots?
When stored properly, frozen shallots can last 6 to 12 months. Label and date packages, and use the oldest ones first.
Can I use frozen shallots directly in recipes?
Yes, you can use frozen shallots directly in cooked dishes. They are suitable for soups, stews, sauces, and sautés. Avoid thawing and refreezing.
Can I freeze shallots in a vacuum sealer?
Yes, a vacuum sealer can help remove more air, reducing the risk of freezer burn. Ensure the shallots are pre-frozen before vacuum sealing.
Should I defrost frozen shallots before cooking?
It’s best to thaw frozen shallots in the refrigerator for optimal texture. Drain excess moisture before using them in your recipes.
Can I refreeze shallots once thawed?
It’s not recommended to refreeze thawed shallots, as it can affect their quality. Plan to use the entire batch or store leftovers in the refrigerator.
How do I prevent freezer burn on shallots?
Use airtight containers or freezer bags, remove excess air, and pre-freeze shallots on a tray before transferring to long-term storage.
Can I freeze shallots with other vegetables?
It’s advisable to freeze shallots separately to maintain their texture and flavor. This allows you to use them more flexibly in different recipes.
Conclusion:
Preserving shallots is an art that elevates your culinary creations. Begin by allowing freshly harvested shallots to undergo a brief curing process, granting them a robust flavor profile. Trim the tops, leaving an inch for optimal storage.
Choose a cool, dark haven for your shallots, steering clear of the refrigerator’s cold grasp. The key is maintaining a delicate balance not too humid to avoid rot, and not too warm to thwart sprouting.
With these steps, you unlock the secret to shallot preservation, ensuring a reserve of aromatic, flavorful bulbs that infuse every dish with culinary magic.